Introduction
![]()
DomainAv
Version 1.1.0
DomainAv is an PHP script built with Laravel 6, Bootstrap 4 and jQuery 3. This script is an extensive tool for checking domain name availability. With this script you can boost up your earning by advertisement and affiliate marketing by providing domain availability information to your visitors because this script is super ready for ad monetization and domain affiliate system. You have all the option to set SEO Meta data each and every page so that you don’t miss a single visitor from Search Engines. Moreover, you will be amazed to see how customizable this script is!
Let's explore!
Installation
Requirements
- PHP >= 7.2.0
- GD PHP Extension
- cURL PHP Extension
- OpenSSL PHP Extension
- JSON PHP Extension
- Free storage space >= 70 MB
Installation process
1. Create Database
Create a database from hosting panel. If you don't know how to do that, contact your hosting provider or you can watch these video tutorials-
- How to create database in cPanel
- How to create database in Plesk
- How to create database in DirectAdmin
We will require the following information in the next steps-
- MySQL Database name
- MySQL User
- User Password
- Host (it is typically localhost or 127.0.0.1)
- Port (it is typically 3306)
The user must be added to the database with all privileges, otherwise the application won't work.
2. Import Database Tables
- Log into phpMyAdmin
- Navigate to the newly created database
-
Import
domainav-database.sqlin the database. If you don't know how to import an SQL file in database, contact your hosting provider or watch this tutorial video.
3. Upload Script.zip
- Log into your hosting file manager.
- Upload
Script.zipfile in your desired folder. If you want to install the script in domain root (e.g. https://yourdomain.com), you should upload the script inpublic_htmlorhttpdocsfolder. - After uploading, extract the ZIP file. After extraction, delete the ZIP file.
4. Configure application
- Open the
.envfile which is inside application folder (public_html/application/.env) and follow the next steps.
.env file.
APP_NAME= My App Name    < This is wrong
APP_NAME="My App Name"   < This is right
APP_NAME=MyAppName       < This is right
4 (a). Set Database Information
- Set database information values in .env file as below (line 9 to 14)-
	DB_HOST=127.0.0.1
	DB_PORT=3306
	DB_DATABASE=your_database_name
	DB_USERNAME=your_database_user
	DB_PASSWORD=user_password
4 (b). Set SMTP Information
It is required to set SMTP information in the .env file for a working mail system (required for email
verification,
password reset email, etc.) in line 17-24. Once you set SMTP information, remove the line
MAIL_DRIVER=log from the .env file. For SMTP information, contact your hosting
provider.
 	MAIL_MAILER=smtp
        MAIL_HOST=your_smtp_host
        MAIL_PORT=your_smtp_port
        MAIL_USERNAME=your_smtp_username
        MAIL_PASSWORD=your_smtp_password
        MAIL_ENCRYPTION=your_smtp_encryption
        MAIL_FROM_ADDRESS=your_from_email
4 (c). Set Admin Email
Set admin email as ADMIN_EMAIL=your.email@gmail.com
After you set your email here, you must register an admin account with the same email.
4 (d). Other configurations
APP_NAME=YourAppName(you can change it later from admin dashboard)APP_URL=https://your-website-homepage.com(this is important and the URL must be the public accessible homepage URL of your website. Use https:// if you have SSL installed on your server for your domain)- After setting all these values, save the .env file.
5. Congratulations!
Your DomainAv Application is ready to use! Visit your homepage. If you see any error, review the whole process if you have any mistakes or contact us for professional support.
Default Admin
Your public pages are ready. But if you cannot register and login as an admin for any reason, use the default admin credentials as below-
Email: default@devslib.com
Password: default_password (Change the password immediately after login)
Register Admin Account
Before you register admin account, place your email in the .env file as admin email. (If you have already added the email in a process of setting multiple admin account, you don't need set it again in .env file).
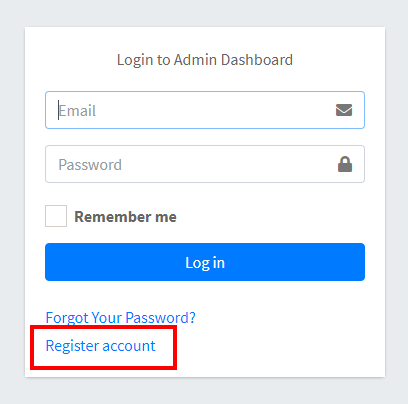
- Go to the log in screen.
- Click on the Register account link.
- In the next page, fill all the fields of the form. Use the email you set in .env file. Otherwise you will not get administrative access for your website.
- If you have already set SMTP information correctly, you should receive an email with the email
verification link.
Otherwise you will get no email. In this case, log into your hosting file manager and open this
log file
public_html/application/storage/logs/laravel.log. You will find your email verification link at the bottom of the log file which is similar to this-# Hello! Please click the button below to verify your email address. Verify Email Address: https://your-site.com/admin/email/verify/19/a287cec804201....
To see how to set multiple admin, see here.
Dashboard
Dashboard is the homepage of your website admin panel. This is where you will start your administrative work for your website.
Log in to dashboard
Click on Login at the top right corner of the screen to go the login screen. Enter your Log in credentials and Log in
There are couple of things you can do in this page.
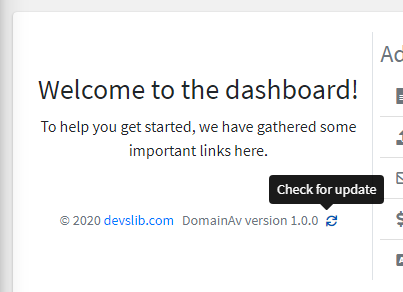
Application update checker
Click in the little sync icon to check for new updates.
Navigation of the admin dashboard
A list of links for operating various tasks in the admin dashboard is gathered together for your convenience.
Stats
A small statistics of the website can be observed in this section of the page.
Reports
In reports page, you can view the recent searches done by the visitors.
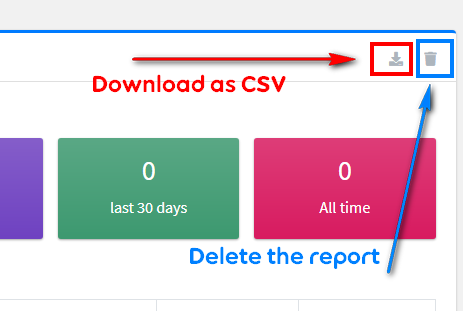
Download a report
Click on the small download icon to download a report.
Delete a report
Click on the small delete icon to delete a report. It is better to delete the report time to time because otherwise your database may have a huge number data which may cause performance issue. Before you delete any report, download the report first. Because deleting cannot be undone.
Generic pages
Generic page feature is a great feature for creating regular text and image based pages. You can create an About Us page, a Privacy Policy page or a Terms of Service page using this feature.
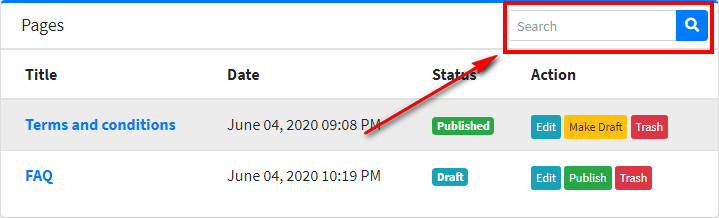
All pages
List of pages already created in your website.
Published
List of pages that are published and publicly visible.
Drafts
List of pages that is not published yet.
Trash
List of pages that you want to delete
Create a page
Click on the Create button. In the next page, you will get the page creation form. Fill all the necessary fields.
Title
Title of the page
Subtitle
Subtitle of the page (optional)
Slug
The part of the URL where public will access the page. Slug must contain only alphanumeric characters and dashes and it must be unique.
Content
Content of the page. If you want to add any image, you require the URL of the image. For that, go to
Media Files > Upload and upload your
image. After uploading, click "Copy URL" (you will find
it at the right side of the row). Now you can use the URL in your page.
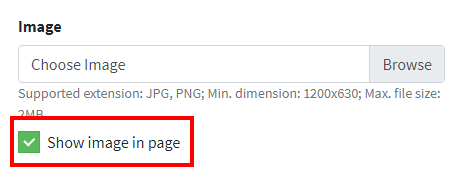
Image
Choose a featured image for the page. If you don't want the featured image to be shown in the page, uncheck the option "Show image in page".
Meta description
Provide meta description for the page. This is required for better SEO.
Canonical URL
If your page is duplicate of another page, set the orignal page link in this field. Otherwise duplicate contents may cause penalty by search engines.
SEO overview
For better SEO, some points are required to consider such as the length of the content, number of Heading texts, etc. In the this section you will find a basic SEO overview of the page you are creating. In this section, the recommendation for different SEO considerable points are also noted. Try to follow for better SEO.
Now you can publish the page or save as draft by clicking the Publish and Save as draft buttons.
Edit a page
To edit a page, click on the Edit button at the right side of the corresponding page.
Make a published page draft
If you want to unpublish a page but you don't want to delete the page, you can use this feature. To make a page draft, click on the Make Draft button at the right side of the corresponding page. You will be asked for confirmation, confirm by Clicking on Draft button. Make draft button only appears in the Published Pages list.
Publish a draft page
If you want publish a draft page, click on the Publish button at the right side of the corresponding page. You will be asked for the confirmation, click Publish to confirm. Publish button only appears in the Draft Pages list.
Trash a page
Trashing a page will remove the page from both published and draft folder. This option is handy because you trash a page, you can still resotre it later. To trash a page, click on the Trash button at the right side of the corresponding page. You will be asked for confirmation, click Trash to confirm. Trash button does not appear in the Trashed Pages list.
![]()
Restore a page
To restore a trashed page, go to the Trash pages list. Click Restore button at the right side of the corresponding page. Click Restore when you will be asked for the confirmation.
Delete a page
To delete a page, go to the Trash pages and click on the Delete button at the right side of the corresponding page, you will be asked for confirmation. Confirm the delete action by clicking on Delete button.
![]()
Search a page
Go to the list of pages. Enter your search query in the search box at the top-right corner of the list and click search icon.
Media Files
In this page, you will get the list of image files used by your website. You can also add new image files and delete an existing one.
Add an image file
Click on Upload button, a form will appear. Give a file name. File name is useful for identifying the image. Then choose your image file in the next File field and then click Save.
Copy an image URL
In the image/file list, you will see a "Copy URL" button at the right side of each row. Click on the button and automatically the corresponding image URL will copied to your clip board. You can use the anywhere you want (such as in a generic page).

Delete an image
In the image/file list, click on the Delete button, a popup will appear for the confirmation, confirm to delete the image/file.
SEO
One of the most important section in the admin dashboard is the SEO section. From these pages, you can set SEO meta data for all the pages. It is recommended that you fill all the fields in the SEO pages for better search ranking.
General
In this section, you can set General SEO settings which is required for site-wide use.
Title Separator
Set the title separator here. Title separator will be placed between any page specific title and your
website name. Recommended title separator is | because
it takes less space in title area of the browser.
Enable Sitemap
Set it to ON to enable the sitemap, OFF to disable. It is recommended enabling the sitemap for better SEO. If you don't know what sitemaps are, take a look into this.
Include services in sitemap
Check this option to include service or tools pages in the sitemap. This will add tools pages URL in the sitemap. It is recommended that you check option.
Include pages in sitemap
Check this option to include generic pages in the sitemap. It is recommended that you check option.
Include Domain search results in sitemap
Check this option to include Domain check results in the sitemap. This will tell search engines which domains were searched in your website domain checker tool. It is recommended that you check this option.
Sitemap URL
Your website sitemap URL can be found in https://your-site.com/sitemap_index.xml (Enable
sitemap and
the sitemap URL will appear in your dashboard)
Robots.txt file
If you have any instructions for search engine robots, you can place them in this field. If you don't know what Robots.txt is, click here to learn.
After you change any of the fields, do not forget to save the settings.
Webmaster Tools
In this tab, you can place verification IDs of different search engines and service providers.
Place only the ID of the verification meta, not the whole meta tag.
The application takes care of the meta tags. As an example, if you are provided the meta tag <meta
name="google-site-verification" content="abcdefgh-123456789"/> to verify your
website from Google Search Console,
place only the ID abcdefgh-123456789 in Google Search Console field.
Google Search Console
Place your Google Search Console verification ID in this field.
Bing Webmaster Tools
Place your Bing Webmaster Tools verification ID in this field.
Baidu Webmaster Tools
Place your Baidu Webmaster Tools verification ID in this field.
Alexa
Place your Alexa verification ID in this field.
Yandex
Place your Yandex verification ID in this field.
Place your Pinterest verification ID in this field.
Norton Safe Web
Place your Norton Safe Web verification ID in this field.
Homepage
In this tab, you can set meta description and Social share image for your website homepage.
Meta description
Meta description for your homepage.
Social Share Image
Set an image here that will appear in social sites when someone shares your website homepage URL.
Domain Availability Checker
In this tab, you can set title and SEO meta data for Domain Availability checker tool.
Search Page
These meta data will appear in the first page of the tool.
Title
Set title for the search page of Domain Availability checker tool (e.g. Check Domain Availability)
Description
Set description for the search page of Domain Availability checker tool.
Search Result Page
These meta data will appear in the search result page where there is Domain Availability information of the searched domain.
Title
Set title for the result page of Domain Availability checker
tool. Include:domain to include the searched domain. (e.g. "Domain Availability
information of
:domain" which will be converted to "Domain Availability information of google.com"
if someone searches for google.com availability)
Description
Set description for the result page of Domain Availability checker tool.
Include :domain to include the searched domain.
Social Share Image
Set an image here that will appear in social sites when someone shares the Domain Availability search page or a search result page.
Contact Form
Set title, meta description and social share image for the contact form.
Affiliate Registrars
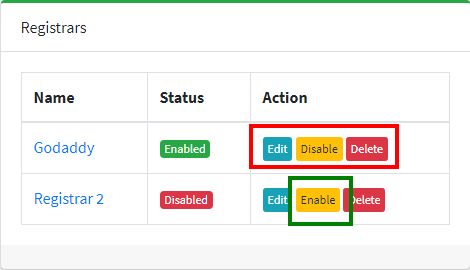
In this page, you can manage domain affiliate registrars and affiliate/referral links.
How this works
When someone searches a domain, if the domain is currently not registered and available to buy, a list of registrars with your affiliate link will be shown to him with a message that the domain is available to buy. If you are not sure what this means, add a registrar and search for a domain which is available to buy to see a live example.
Add new Affiliate Registrar
Click on Add new button to go to the add form. Fill the fields and click Add button.
Name
The name of registrar (e.g. GoDaddy)
URL
Your referral link. Don't forget to replace the domain part of the referral link with {domain}. If
the referral link is https://godaddy.com/register-domain/?domain=newdomain.com&referral=your_referral_id,
replace newdomain.com with {domain}. This will place the visitors domain in the
referral
link. So you will set this URL in the URL field https://godaddy.com/register-domain/?domain={domain}&referral=your_referral_id
Logo
The logo of the registrar. Place a PNG image for a better look.
Offer (optional)
If you have any message to show with the link, you can set it here.
Click Add button to save the registrar.
Edit a registrar
Go to the list of all registrars. To edit a registrar, click on the Edit button at the right side of the corresponding registrar. You will be redirected to edit form.
Disable a registrar
If you don't want to show a registrar temporarily, disable the registrar. You can enable it next time again. To disable a registrar, click on the disable button of the corresponding registrar and confirm in the popup. Note that, if there is no disable button, that means it's already disabled.
Enable a registrar
To enable a registrar, click on the enable button of the corresponding registrar and confirm in the popup. Note that, if there is no enable button, that means it's already enabled.
Delete a registrar
To delete a registrar, click on the delete button of the corresponding registrar and confirm in the popup.
Ads
In the Ads section, you can manage all your ads and ads settings (such as enabling or disabling ads)
General Settings
In this tab, you can enable disable ads on various parts of your website, edit ads.txt file.
Site-wide Ads
This switch is very important. Turn this on to enable ads site-wide, off to disable ads site-wide. If you want to stop showing ads in one click, set it off. All the ads in all pages will be turned off.
Domain Checker Ads
Turn this on to enable ads, off to disable ads in Domain Checker page.
Footer Affiliate Ad
Turn this on to enable ads, off to disable Footer Affiliate Ad.
Show Footer Affiliate Ad on
Footer affiliate is not a page-specific ad. You can select the pages where you want to show it. If you check Domain Checker Page under this field, Footer Affiliate Ad will be visible in Domain Checker pages. If you unselect an option, the ad will not be visible in that particular page. Play with it, check/uncheck different options and see in the front-page for better understanding.
When the below warning appears-
That means, ads are off site-wide, Go to Ads > General Settings and enable site-wide
ads and the warning
will disappear.
Domain Checker Ads
Set ads in the Domain Availability Checker pages
If you see the warning-
That means, even if you set ads in Domain Checker Ads tab, ads won't be shown. To show ads, enable
Domain Checker Ads in Ads > General Settings.
Header Ad
Set ad at the top of the Domain Checker pages
Sidebar Top Ad
Set ad at the top of the sidebar of Domain Checker pages
Sidebar Bottom Ad
Set ad at the bottom of the sidebar of Domain Checker pages
Pages Ads
Set ads in Generic Pages
Header Ad
Set ad at the top of the Generic pages
Sidebar Top Ad
Set ad at the top of the sidebar of Generic pages
Sidebar Bottom Ad
Set ad at the bottom of the sidebar of Generic pages
Footer Affiliate Ad
Set text, links and icons of Footer Affiliate ad. Place shorter texts because long texts will make the ad look ugly. Always take a look after setting this ad in the public view.

Title (in the first block)
First Affiliate Link (the second block)
Title: Give a short title (e.g. Get a domain)
Link: Your affiliate link
Text: A small text (e.g. $0.99 first year)
Icon: Select an Icon
Second Affiliate Link (the third block)
Title: Give a short title (e.g. Get hosting)
Link: Your affiliate link
Text: A small text (e.g. $0.99/month)
Icon: Select an Icon
Button (the fourth block)
Button Text: e.g. Learn more
Button Link: e.g. URL to a page
Messages
This section of the admin dashboard is to see and manage all the messages received in your website through forms (e.g. contact messages). In the current version DomainAv, only contact messages can be received, so for now you can see and manage contact messages in this section. We will update if any other message is introduced in DomainAv in the upcoming versions.
All messages
In this page, you will see the list of all messages that your visitors have submitted for you.
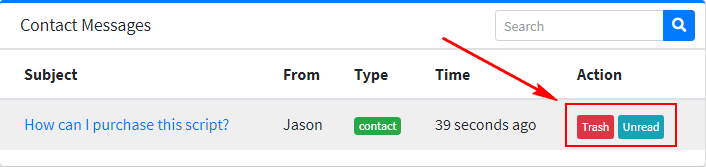
Contact Messages
In this page, you will see the list of contact messages that your visitors have submitted for you.
Unread Messages
This page lists all the unread messages.
Trash Messages
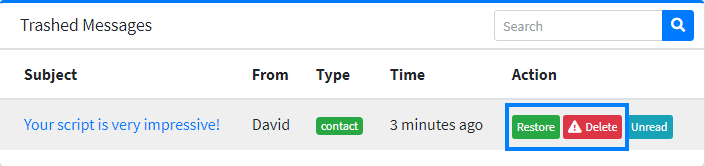
This page contains all the trashed messages.
Read a message
Click on the subject of a message, the message will show.
Unread a message
Go to the list of message, click on the Unread button of the message you want to mark as unread. The button is at the right side of list and will only appear if you already read the message.
Trash a message
To move a message to the trash, go to a lists of messages and click on Trash button and confirm. Or, open a message, go to the bottom of the page and click on Move to trash button and confirm. Note that, if there is no trash button, that means the message is already in trash.
Restore a message
You can restore a message that you moved to the trash earlier. To restore a message, click Restore button in the messages list or open a trashed message and click Restore button that is at the bottom of the page. If there is no restore button, that means, the message is not trashed.
Delete a message
To delete a message, go to the trashed messages, click on the Delete button and you will be asked for confirmation. Confirm by clicking on the Delete button again.
Settings
You will control the whole website from the settings pages. You can set almost everything in the settings. This part of the documentation describes how you can manipulate the whole website using these settings.
Application Settings
These settings will be applied throughout the whole site. After installing, try to set all these settings correctly.
Data Source
One of the most exciting features of DomainAv is the capability of selecting data source. The term "data" means the values of different settings (such as the name of the website, social links, or whether ads are on off, etc). The values are required everywhere in the website and are directly related to the performance of the website. So it is an important matter to handle these values efficiently.
You have 3 options choose as data source
1. Database
All the settings data will be saved in database.
Pros: You will be able to handle all the data from the dashboard. No file edit required.
Cons: All the data will be fetched from database in each request that results in higher response time and ultimately drop performance. (continue reading, there is a solution of this problem)
2. Configuration
All the settings data will be fetched from the config file (a config file is a PHP file
where you
can save/store data). The config file is a built-in feature of Laravel. A lot of config
files are
being used currently in DomainAv by default.
Choosing this option will use another additional config file
(public_html/application/config/custom.php) as the data source.
Pros: Requires no additional database calls. Best for the performence.
Cons: You will need to edit the custom.php file manually each time you want change a setting.
3. Enable Cache
This is not a standalone source like the other two. If you choose database as the data source, you can enable caching to reduce database calls which greatly enhances the performance and ultimately overcomes the cons of database source. The settings data is fetched from the database are saved in cache.
Recommended data source
It's recommended to use Database as data source with caching enabled. This ensures the easiest usability with maximum performance.
Save the source setting each time you change data source
Clear Cache
If you use database as data source with caching enabled, the data saved in the cache may create problem (you may see a setting value not updating). This is because the cache is not reloaded for any reason. If you see such thing, just clear the cache here. Not only the settings data cache will be removed, it also removes other cached data. You may see a little performance drop after clearing the cache (because all data will be loaded in the cache again and it requires some time)
Just click on Clear Cache button to dump all caches.
Export Settings Data
You can export all your settings data in two formats. Both of them has some uses. Let's see when you will need which one.
1. Export as JSON
Export data as JSON if you just want save your current data as a backup. JSON data is useful only when the data source is database. You cannot use JSON data when the data source is the configuration file. It is recommended you export JSON data time to time and before any data import operation.
2. Export as PHP
If you want switch data source to config, you need to export all current settings data to
PHP config
file. First click Export as PHP and a custom.php file will be downloaded. Place
the file at
public_html/application/config folder.
There is already a custom.php file there, so before uploading, you may need to download/keep
a
backup of the previous custom.php file to avoid any unwanted issues.
Import Settings Data
You can import previously downloaded JSON settings data through this option. But make sure you have exported the current settings data before any import operation so that you can revert it back if anything goes wrong. Select the JSON file and click Update Settings from JSON.
General Settings
Set all the information in this tab to make the website more personal.
Website name
Your website name should be set here.
Website tagline
Website tagline should be added here.
Logo
Set a square sized logo of your website here. Recommended format is PNG.
Navigation Bar Logo
Set a logo which is suitable for the navigation bar
Use logo in Navbar
Set this ON to show the Navigation Bar Logo at the navigation bar. Otherwise, your website name will appear at the navigation bar as a plain text.
Favicon
Set a 32x32 favicon for your website. Recommended format is .ICO.
Website Footer Text
Set footer text of the website.
Footer Copyright
Set copyright text which appears at the bottom of the footer.
Footer Menu
Manage your website footer menu through this option.
Menu title
Give a title to the menu.
Menu Items
Set menu items
Add new item
Click on Add new item button and a new row of fields will appear. The first field is for the text of the item (e.g. About Us) and the second field is for the link of the item (e.g. link to the About Us page). By default, all the pages will appear as a dropdown once you start typing in the text field. But you can always modify the defaults.
Remove an item
To remove an existing form item, click on the small × button at the right side of that corresponding item. The item will be removed.
What are the icons at the side of the menu items?
This icons let's you know that if the item is valid or invalid. If the icon is a green check icon, that means the item is valid will be added to footer menu once you save it. Other types of icons mean the item is invalid and will not be saved.
Localization
Localize your website through these options.
Timezone
Set your timezone.
Date format
Follow PHP's convention for date format.
d = 04, D = Thu, l = Thursday, m = 06, M = Jun, F = June, Y = 2020, y = 20
Time format
Follow PHP's
convention for date format.
h = 07 (12-Hour) H = 19 (24-Hour) g = 7 (12-Hour, no leading zero) i = 56 (minute) s = 22 (second) A = PM a = pm
Fonts and Styles
You can customize some basic styles through this tab.
Font
Select a Google Font for your website from 900+ Google fonts.
Navigation Bar Color
Set navigation bar color. It should be an HTML HEX color code (e.g. #FF0000). Try to set a dark color.
Footer Color
Set footer color. It should be an HTML HEX color code (e.g. #000000). It's better to choose a dark color matching the navigation bar color for a better look.
Contact Form
Set contact form details here.
Title
The title of the contact needs to be set here. Try to make it short.
Description
A small description about contact information that will appear above the contact form.
Social Profile
Set social profile links in this form. All the form fields must be a valid URL. Only the filled fields will appear in the public view.
Check Show on Top Navigation Bar to show social profile links in the navigation bar. Check footer to show in the footer.
About Card
About card is a small card (a card is like a widget) that appears at the sidebar containing a form for all the tools of the website. You can manage the card in this tab.
Title
The title of the card. Try to make it shorter.
Description
A small description that appears above the form. Try to make it shorter.
Homepage Settings
These settings will be applied only in the homepage of your website.
Search Section
Manage and customize the search section which is at the top of the homepage.
Title
The large title text that appears above the search field. Try to be creative in this title because this makes the first impression of your website.
Background
The background of the section. Set an image with a minimum dimension of 1920x1080 here. Dark background is more preferable.
Short Description
A short description above the search field. Try to make it short.
About Section
Set and change texts and image of about section of the website. In this section, you should focus about the major functions of your website.
Switch Section
Set it to OFF if you don't want to show this section. Or set to ON.
Title
The title of the section
About Image
An image that appears beside the title and description
Short Description
A short description below the title of the section. Try to make it short.
Quick Start Section
The quick start section is just under the About section. You can place some icons with title and texts in this section. An embedded video can also be placed in this section.
Switch Section
Set it to OFF if you don't want to show this section. Or set to ON.
Title
The title of the section
Embed video URL
The embed URL of a video. Note that, this is not a regular URL, rather, it's an embed URL. Do not place the whole iframe tag that is given by video providers (such as YouTube). Place just the embed URL.
Blocks
There are 3 blocks. You can set title, text and an icon for each block. Set them as your choice and see how they look like.
Features Section
This is the next section which appears just after the Quick After section. It's almost same as Quick Start section when you manage. But the looks of the two section are somewhat different and it has 6 blocks (or feature)
Switch Section
Set it to OFF if you don't want to show this section. Or set to ON.
Title
The title of the section
Feature blocks
There are 6 feature blocks. Each has a title field, an icon field and a text field. If any field has the missing title or text or icon, the block will not be shown.
Domain Checker Settings
All the settings in this page will be applied to the Domain Availability Checker Tool.
Welcome Content
The first content the visitors will see when they visit the tool. It's also important for SEO. It's recommended that you complete this section and turn it ON.
Switch Section
Turn ON or OFF this section. Turning off of this section will unpublish this content which is not recommended at all.
Title
The title of the welcome content.
Short Description
The description of the content. Consider this as a regular blog post and write it in a way so that search engines like the post.
Search Form
The search form that is at the top of the Domain Availability checker tool.
Heading
The heading of the form
Input Placeholder
Input placeholder for the domain field. Set a sample domain in placeholder.
Button text
The button text that will appear in the Domain Availability checker form button.
Search Result
These settings will be applied in the result section of Domain Availability checker tool.
Title
The title of the result section. Include :domain which will be replaced by the
searched domain.
Sharing option
Turning on will show the social share buttons in the result section which is recommended.
Welcome content
If you don't want to show the welcome content with the result, turn this off.
Other extensions and suggestions
Godaddy API Key & Secret
Other extensions and domain suggestion is collected from Godaddy through API. For this, a key and a secret is required. It is highly recommended that you create your own API credentials otherwise this functionality may not work. You can get Godaddy API key and secret from here
Extensions Section
Enable or disable other extension from showing in Domain Availability result page.
Extensions
Select the most popular extensions only. Only these extensions will be searched for availability. It is recommended to select 10-15 most popular extensions only.
Suggestions Section
Enable or disable domain suggestions from showing in Domain Availability result page.
Number of suggestions
Set the number of domain suggestions here. Set a number between 20 and 100.
Unavailable Message
If the domain is not available, this message will be shown. Set title and description
including
:domain
which will be replaced by the searched domain.
WHOIS website
Set a WHOIS URL to show visitors the WHOIS information of the domain as it is already purchased.
Domain Availability Settings
When a searched domain is available to buy, a special card with your referral links will be shown to the user. This setting will be applied to that card. Before that, you must set some registrars first.
Title
The title of the card. Include :domain to be replaced by the searched domain.
Description
A small description that will appear before the referral links. Include :domain
to
be replaced the
searched domain.
Button Text
Button text (e.g. Buy, Purchase, etc.)
Max. Number of registrars
The maximum number of referral links to be shown. Set it to minimum 4.
Sidebar
This settings will be applied on the sidebar of Domain Availability checker tool.
Enable or disable sidebar cards
Cards are similar to widgets.
About Card
Enable or disable About Card in Domain Availability checker tool sidebar
Recently Searched Domains
Enable or disable showing recently searched domains.
Recently searched domains
Title
The title of the recently searched domains card.
Number of domains
Set the number of domains for recently searched domains card.
Miscellaneous Settings
Custom Codes
Set different types of custom code in this settings page.
Custom CSS Code
Set your custom styles here. There is no need to wrap the code with <style> tags. They are automatically wrapped.
Custom JS Code
Set your custom JS code in this field. Again, there is no need to wrap the code with <script> tags. They are automatically wrapped.
Custom Header Code
Place any header code in this field. You can place your Google Analytics Tracking Code here. Any
code set here should be HTML-like (should be wrapped with HTML tags). The code set here will be
placed inside <head></head>
tags.
Custom Body Code
Place any body code in this field. You can place Facebook Social Plugins (comment or like
plugin)
code here. Any code set here should be HTML-like (should be wrapped with HTML tags). The code
set
here will be placed just after the
opening <body> tag.
Custom Footer Code
Place any footer code in this field. Any code set here should be HTML-like (should be wrapped
with
HTML tags). The code set here will be placed just before the closing </body>
tag.
Maintenance
You can turn on maintenance mode of your website through these options. Turning on maintenance mode will turn of all the public pages.
Maintenance mode
Set it to ON to turn the maintenance mode on.
Maintenance time
Set the time you want the maintenance mode to be enabled for. If you choose the option "Until I turn off", the maintenance mode will need to be manually turned off. Otherwise, the mode will be turned off after the specified time set in this field.
Maintenance Message
Set a custom message for the maintenance mode. Keep it very short (e.g. Under Scheduled Maintenance)
404 Settings
Set custom options for 404 error page.
Title
The title of the 404 error page.
Message
The message of the 404 error page.
About Card
If you enable this, the About Card will be shown in the 404 error page.
Block Queries
You can block domains and IP addresses. If someone searches these domains or IP addresses, he will be shown a block message. See how you can configure this.
Block domain
Type all the domains you want to block. Separate them by a simple comma (e.g. facebook.com, google.com). Type only the domain (no http:// or www).
Message for blocked domain
Set the message that will be shown when someone inputs a blocked domain.
Profile
To go to your profile, click on the "user" icon at the top-right corner and click Profile.
Current Profile
You will get your profile information in this page.
Edit Profile
In this tab, you can edit your profile. You can change your name and avatar here.
Change Password
In this tab, you can change your password.
Current Password
Type your current password at this field.
New password
Type your new password here.
Confirm new password
Re-type your new password here.
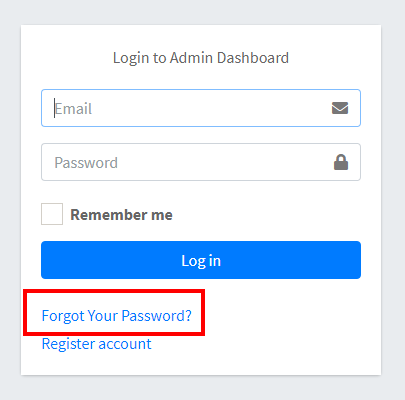
Recover password
If you forget your password, you can recover your password also. Click "Forgot your password?" link in the log in and you will directed to give your email. Submit your email and you will be given a link in your email. Click on the link, you can set your password in the next screen.
Didn't receive the password reset email?
If you set SMTP information correctly, you should receive the email. If you have not set SMTP
information already,
you will not get the password reset email. In this case, log into your hosting file manager and open
this log file
public_html/application/storage/logs/laravel.log. You will find your reset link at the
bottom
of the log file.
Update Application
When an update is available, it is strongly recommended that you should update DomainAv. Because there may be some features upgrade, fixes or security patches available with the update.
How to apply update
Please follow the update instruction given with every update.
Add multiple admin
To add multiple admin, follow the procedure given below-
- Log into your hosting file manager
- Open
public_html/application/app/Providers/AuthServiceProvider.php - Find a line that says
// Add additional admin emails - Just after the line, add this line
$adminEmails[] =
                        'another.admin.email@gmail.com';
(replace another.admin.email@gmail.com with your email) - Save the file
- Register an account with the newly added email
- Log in
Remove default admin
It is extremely important to remove the default admin email for security reason. Because everyone having this script knows the default admin credentials. If you have not set up your own admin account, set up now. If you have set up your own admin account, immediately follow the given procedure-
- Log into your hosting file manager
- Open
public_html/application/app/Providers/AuthServiceProvider.php - Find a line that says
// Default admin email - Remove the next line (it'll look similar to
$adminEmails[] = 'default@devslib.com';) - Save the file.
Change Default URLs
In the current version of DomainAv, it's not possible to change default URLs (such as URLs of different tools, Contact page, Admin URL, etc.) through admin dashboard. But you can change them by a simple code edit. Let's see how you can do this.
- Log into your hosting file manager.
- Open
public_html/application/app/Providers/RouteServiceProvider.phpand follow the next instructions.
Change tool URL
- Find a line that says
public const AVAILABILITY_ROUTE = '/domain-availability'; - Change
/domain-availabilityto something else as you want (e.g./check-domain) - Save the file.
Change Contact Form URL
- Find a line that says
public const CONTACT_FORM_ROUTE= '/contact'; - Edit
contactas you wish, but stick to the URL structure rule. - Save the file.
Change admin URL
You may want to change admin URL for security reason. You can absolutely change the admin URL, but you may need log in again.
- Find a line that says
public const ADMIN_HOME= '/admin'; - Edit
adminas you wish (e.g.secret-admin-panel, but stick to the URL structure rule. - Save the file.
Hide admin URL
To hide the power icon with admin login link-
- Log into admin panel
- Go to
Settings > Miscellaneous > Custom Codesand paste this code at the bottom of the Custom CSS Codes field
	.navbar .nav-item .nav-link[title=Login]{
		display:none;
	}
A better way to hide the admin URL will be implemented in the next update of DomainAv. If you want
to do it now, you can see the
source file at
public_html/application/resources/views/public/layout/partials/navbar.blade.php But
remember to take backup before you touch any code.
Contact
We provide support via support tickets, email and messenger. But you can get the fastest response through Support Tickets. To contact support, visit our support center.